Import
This guide shows how to import the demo project into an existing project.
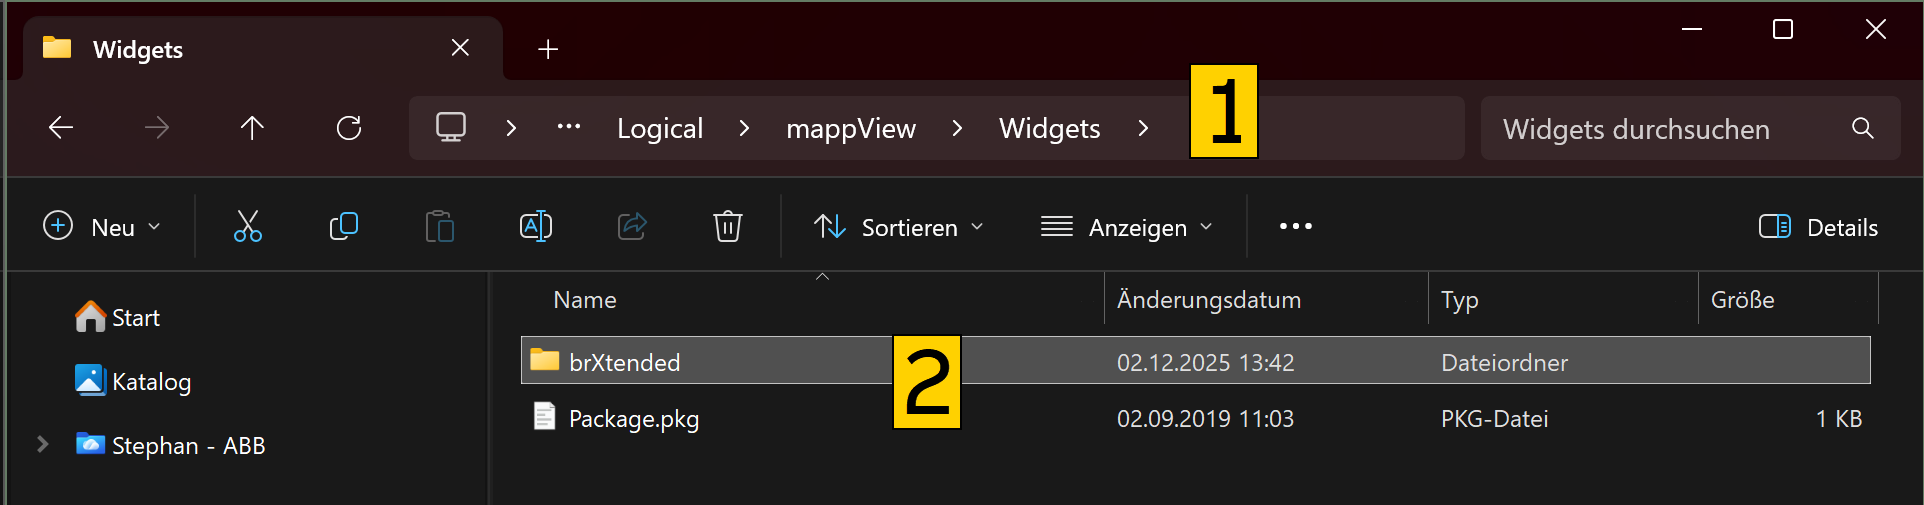
Open the windows file explorer and navigate to the folder \mappExplorer\Logical\mappView\Widgets in the sample project. Copy the folder brXtended to the same directory in your existing project.
Start Automation Studio and open the demo project. Start a second instance of Automation Studio and open your exiting project so that you have both project open side by side. Go to the logical view in both projects.
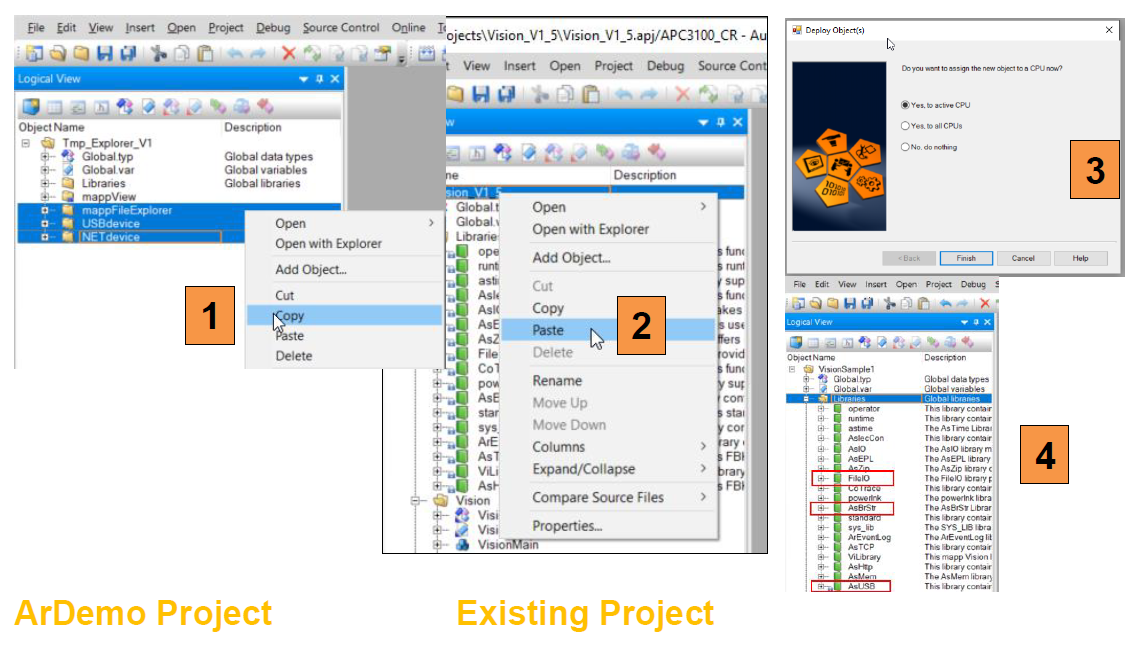
- Copy the packages
mappFileExplorer, USBdevice and NETdevicefrom the demo project - Paste the packages into the existing project at the top
- Assign the new task to the CPU
- Make sure that the B&R libraries
MpFile, MpBase, MpServer, AsZip, ArBrStr, AsUSB, standard, SysLib and FileIOare in the existing project, add the libraries if needed.
- Open the mappView tree in the demo project and navigate to
ExplorerPage, right click and copy it - In the existing project paste the page onto pages
- Assign the new task to the CPU

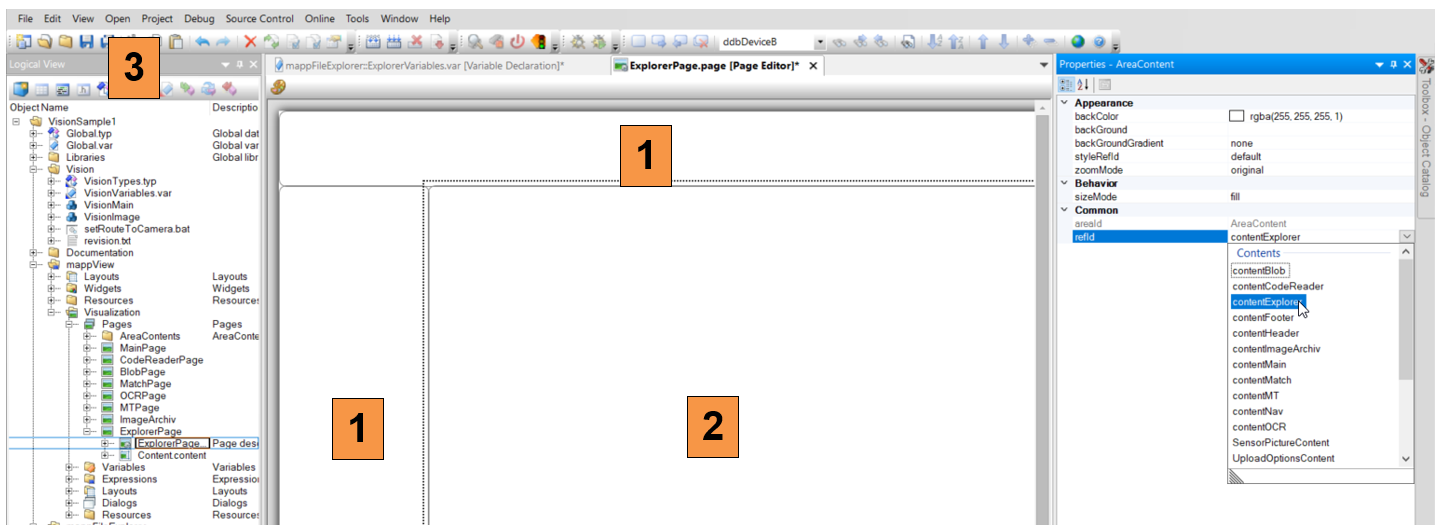
- Expand the new page and double click on
ExplorerPage.page - Select the default layout for the existing project the properties window
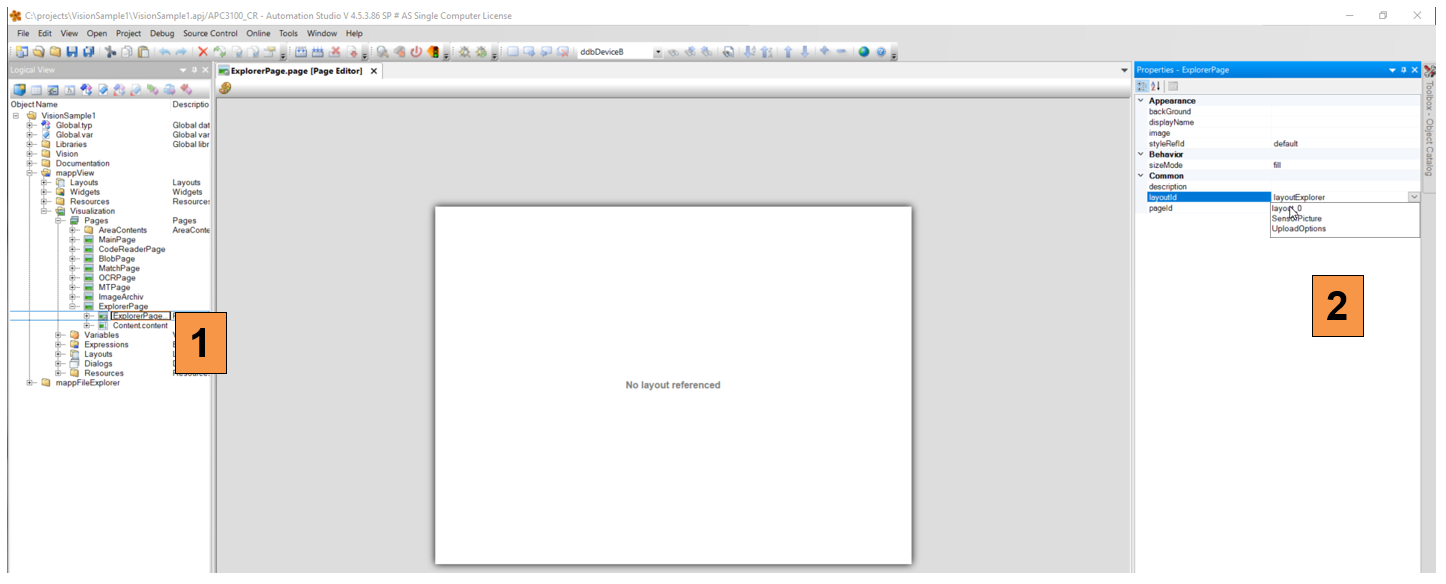
- Once the default layout is set in the existing project click each section and make sure that correct content is selected
- Select
contentExplorerfor the main section - Save the project
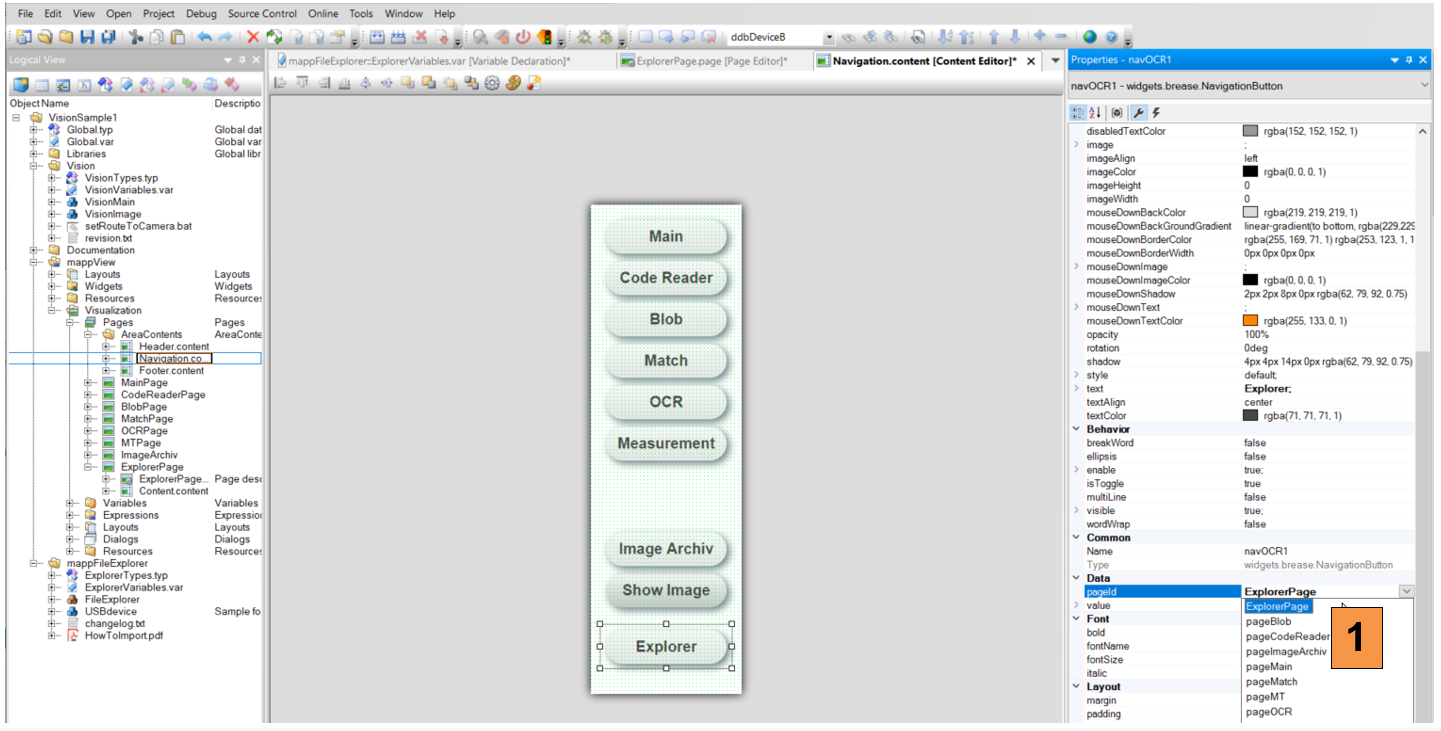
- If the existing project uses a navigation bar add a new button that points to the new explorer page
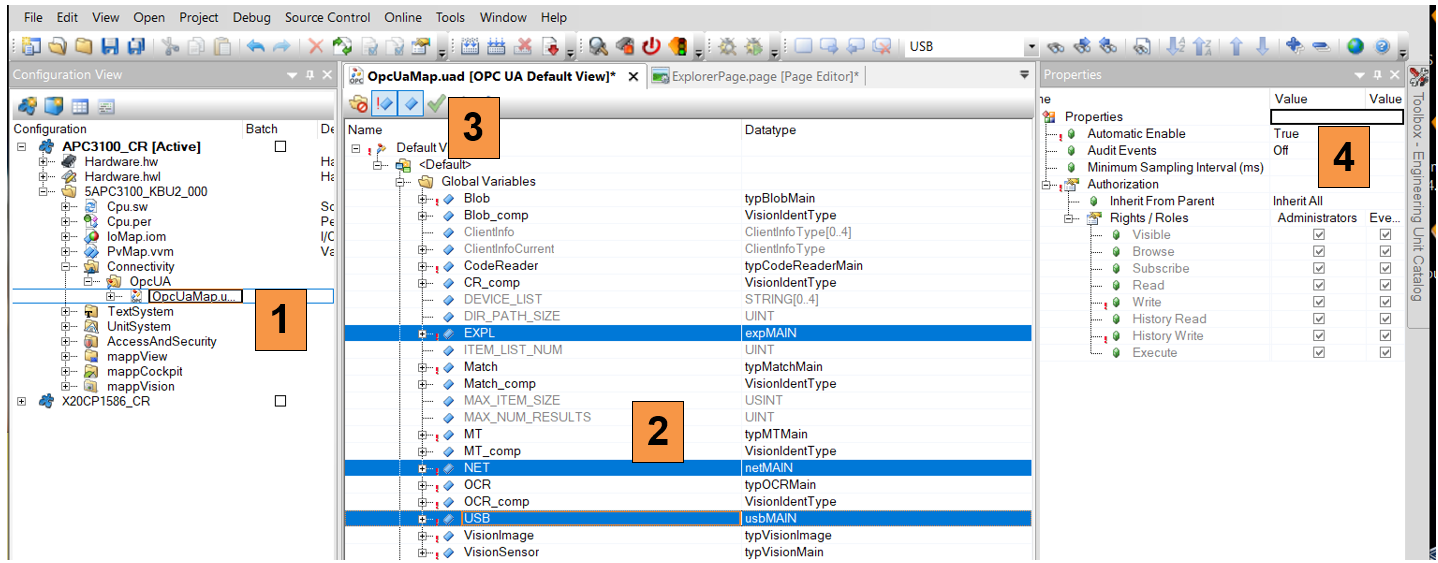
- Open the configuration view in the existing project and open the OPC configuration
- Select the global variables
EXPL, NET and USB. if the variable does not show up, save and compile the project, then reopen the window - Enable the variables with green checkmark
- Set
Automatic Enableto true in the properties window
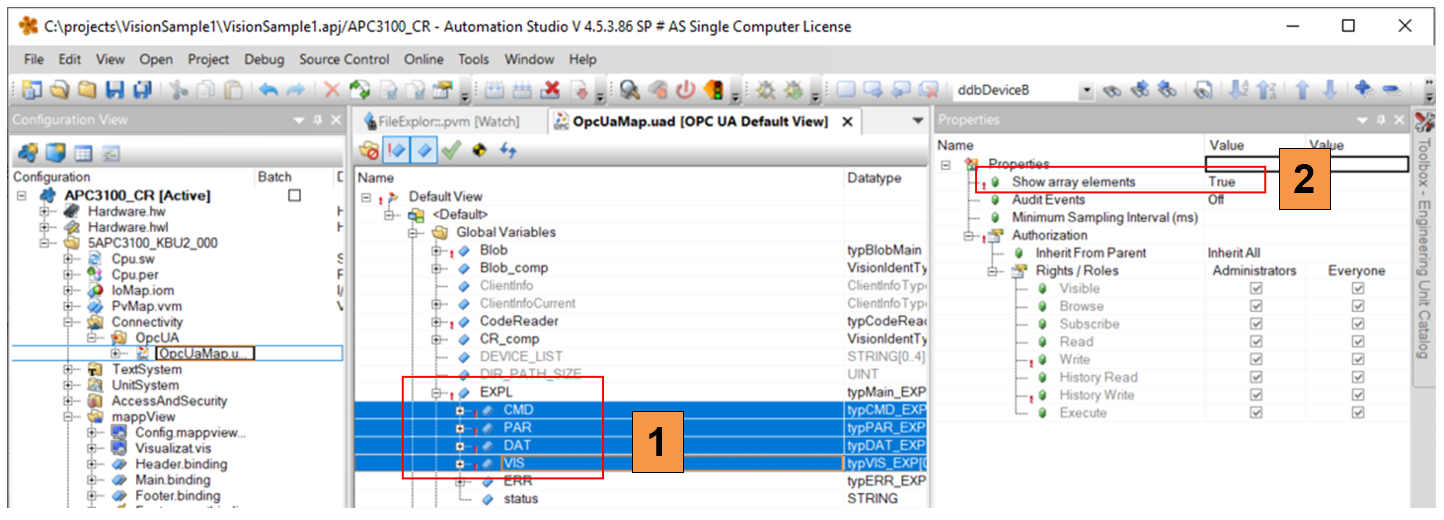
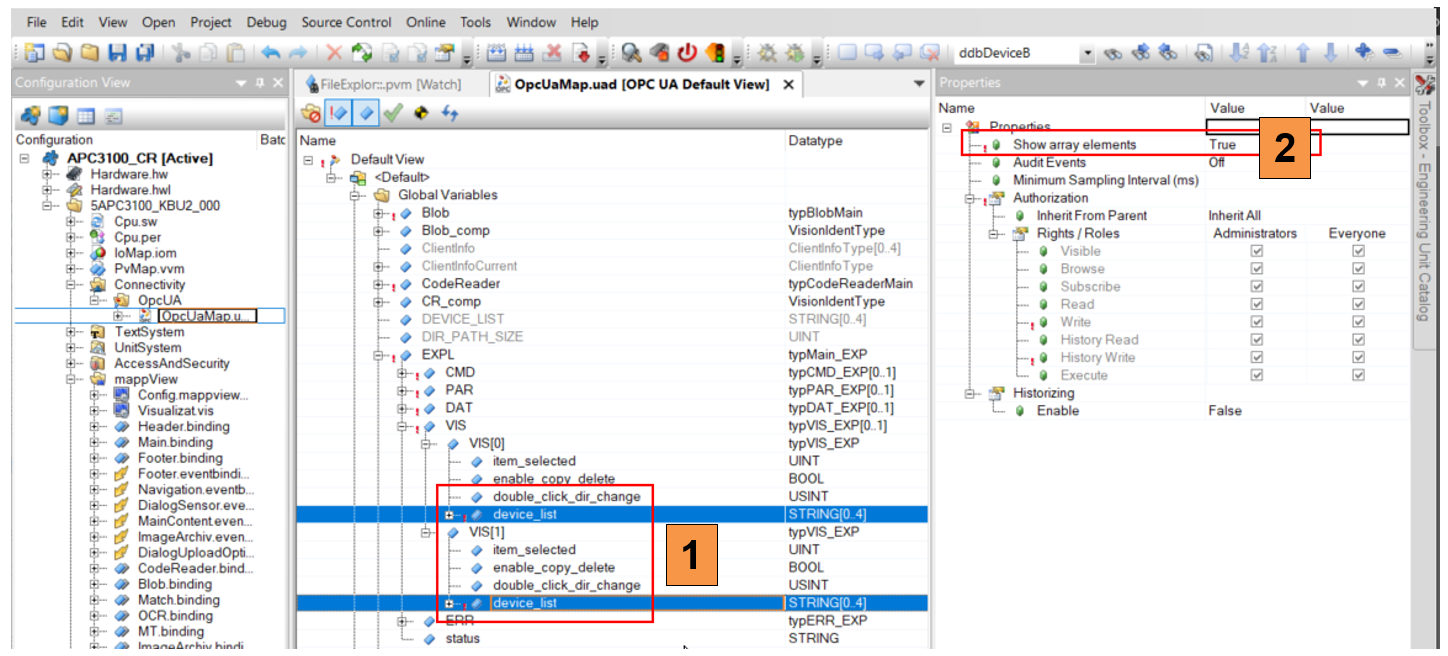
- Select the elements
CMD, PAR, DAT and VIS - Set
Show array elementsin the properties to true
- Select the elements device_list in the sub structure
EXPL.VIS[0] and EXPL.VIS[1] - Set “Show array elements” in the properties to true
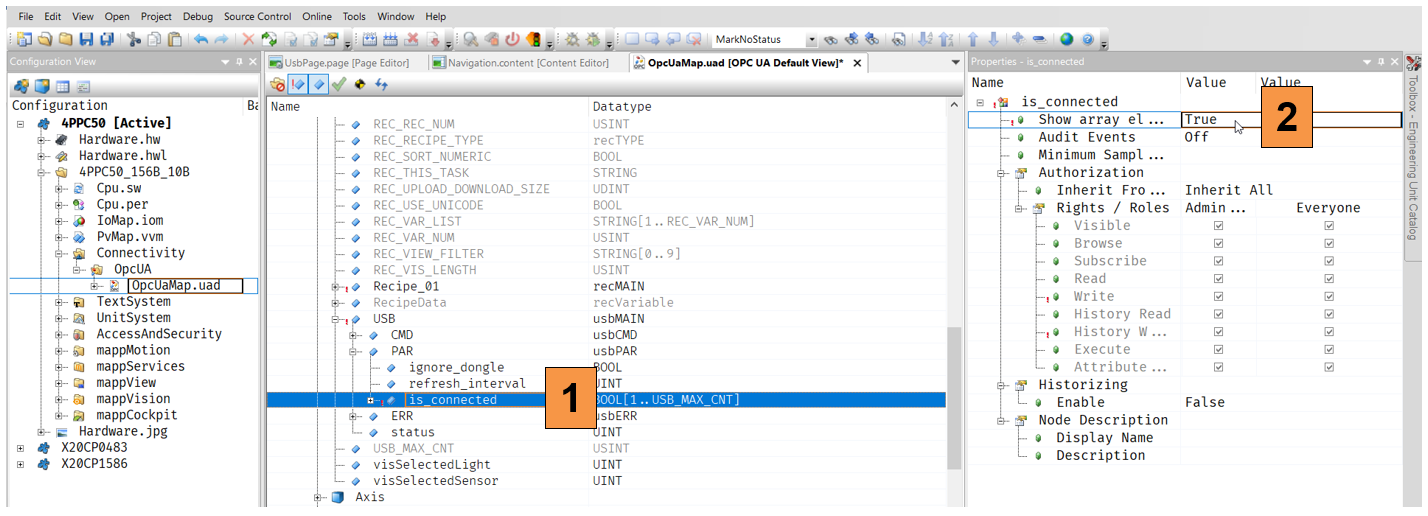
- Select the element
USB.PAR.is_connected - Set
Show array elementsin the properties to true
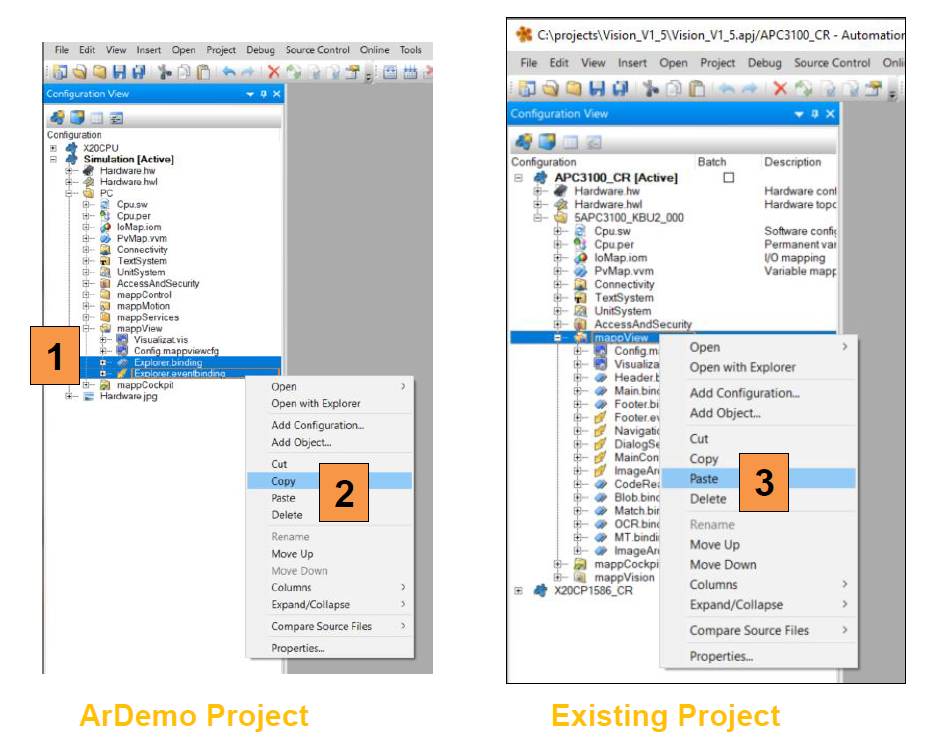
- Expand the section mappView in the existing project and select
Explorer.binding and Explorer.eventbinding - Copy the two files
- Paste the two files in the existing project under mappView
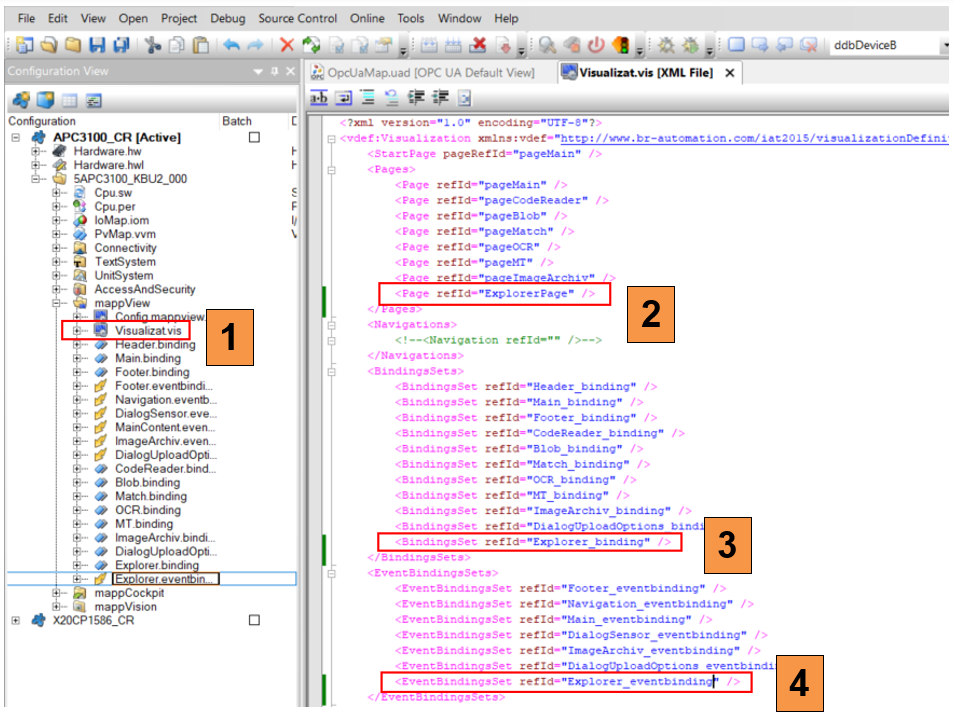
- In the existing project open the file
Visualizat.vis - Add the
ExplorerPagein the section pages - Add the
Explorer_bindingin the section binding sets - Add the
Explorer_eventbindingin the section EventBindingSets
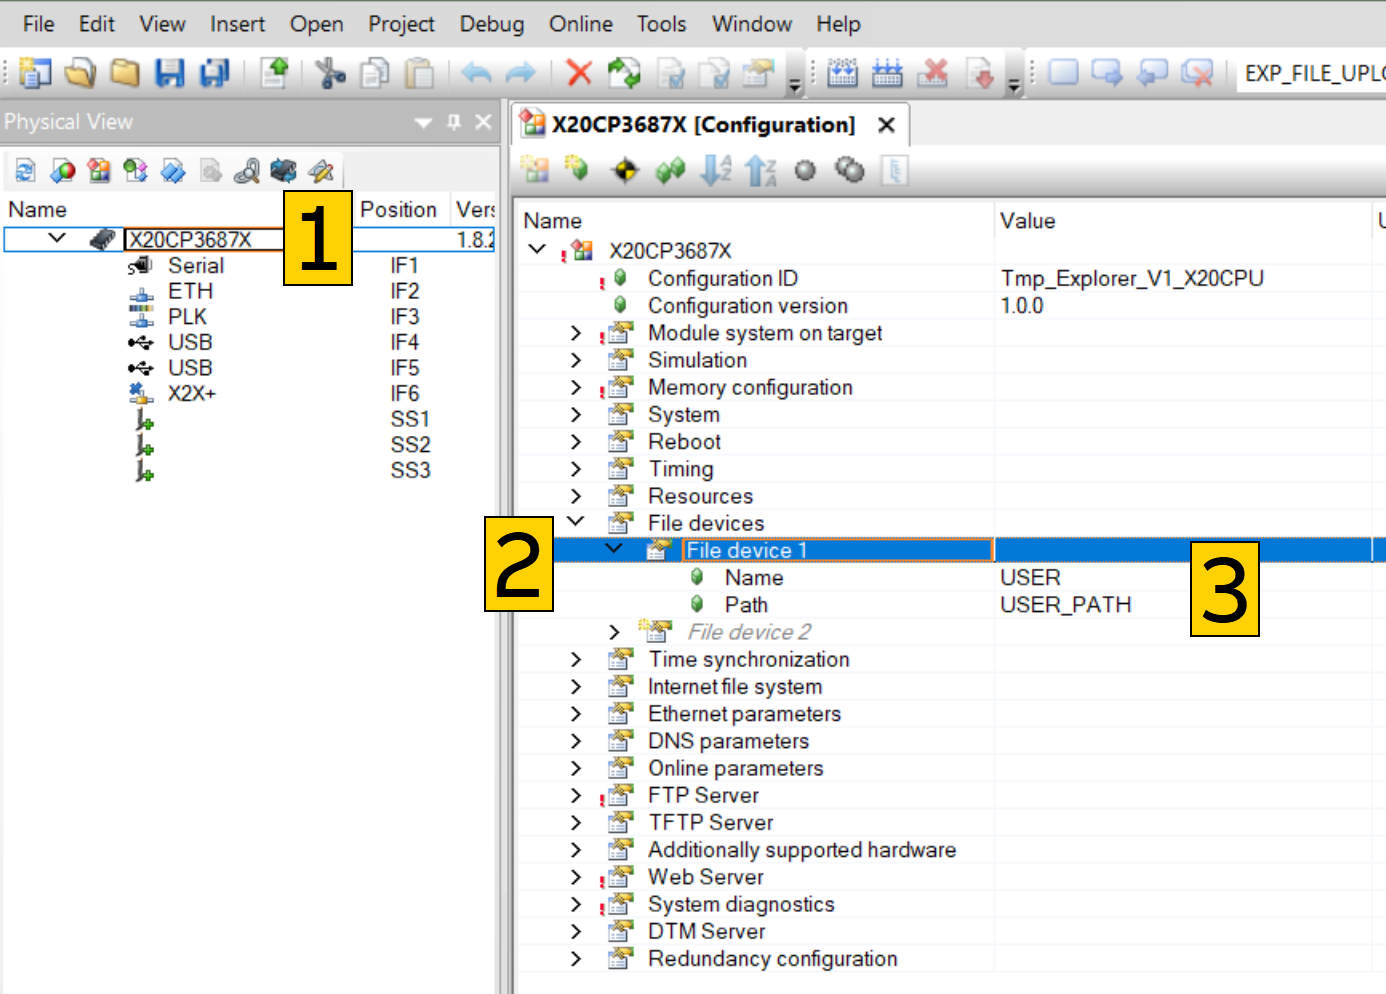
- In the existing project open the Physical View, Right click on the CPU and open the configuration
- Navigate to files devices
- Adjust the device information. The
USER_PATHis located on the 4. partition of the memory card. The size of the user partition can be configured underModule system on target.
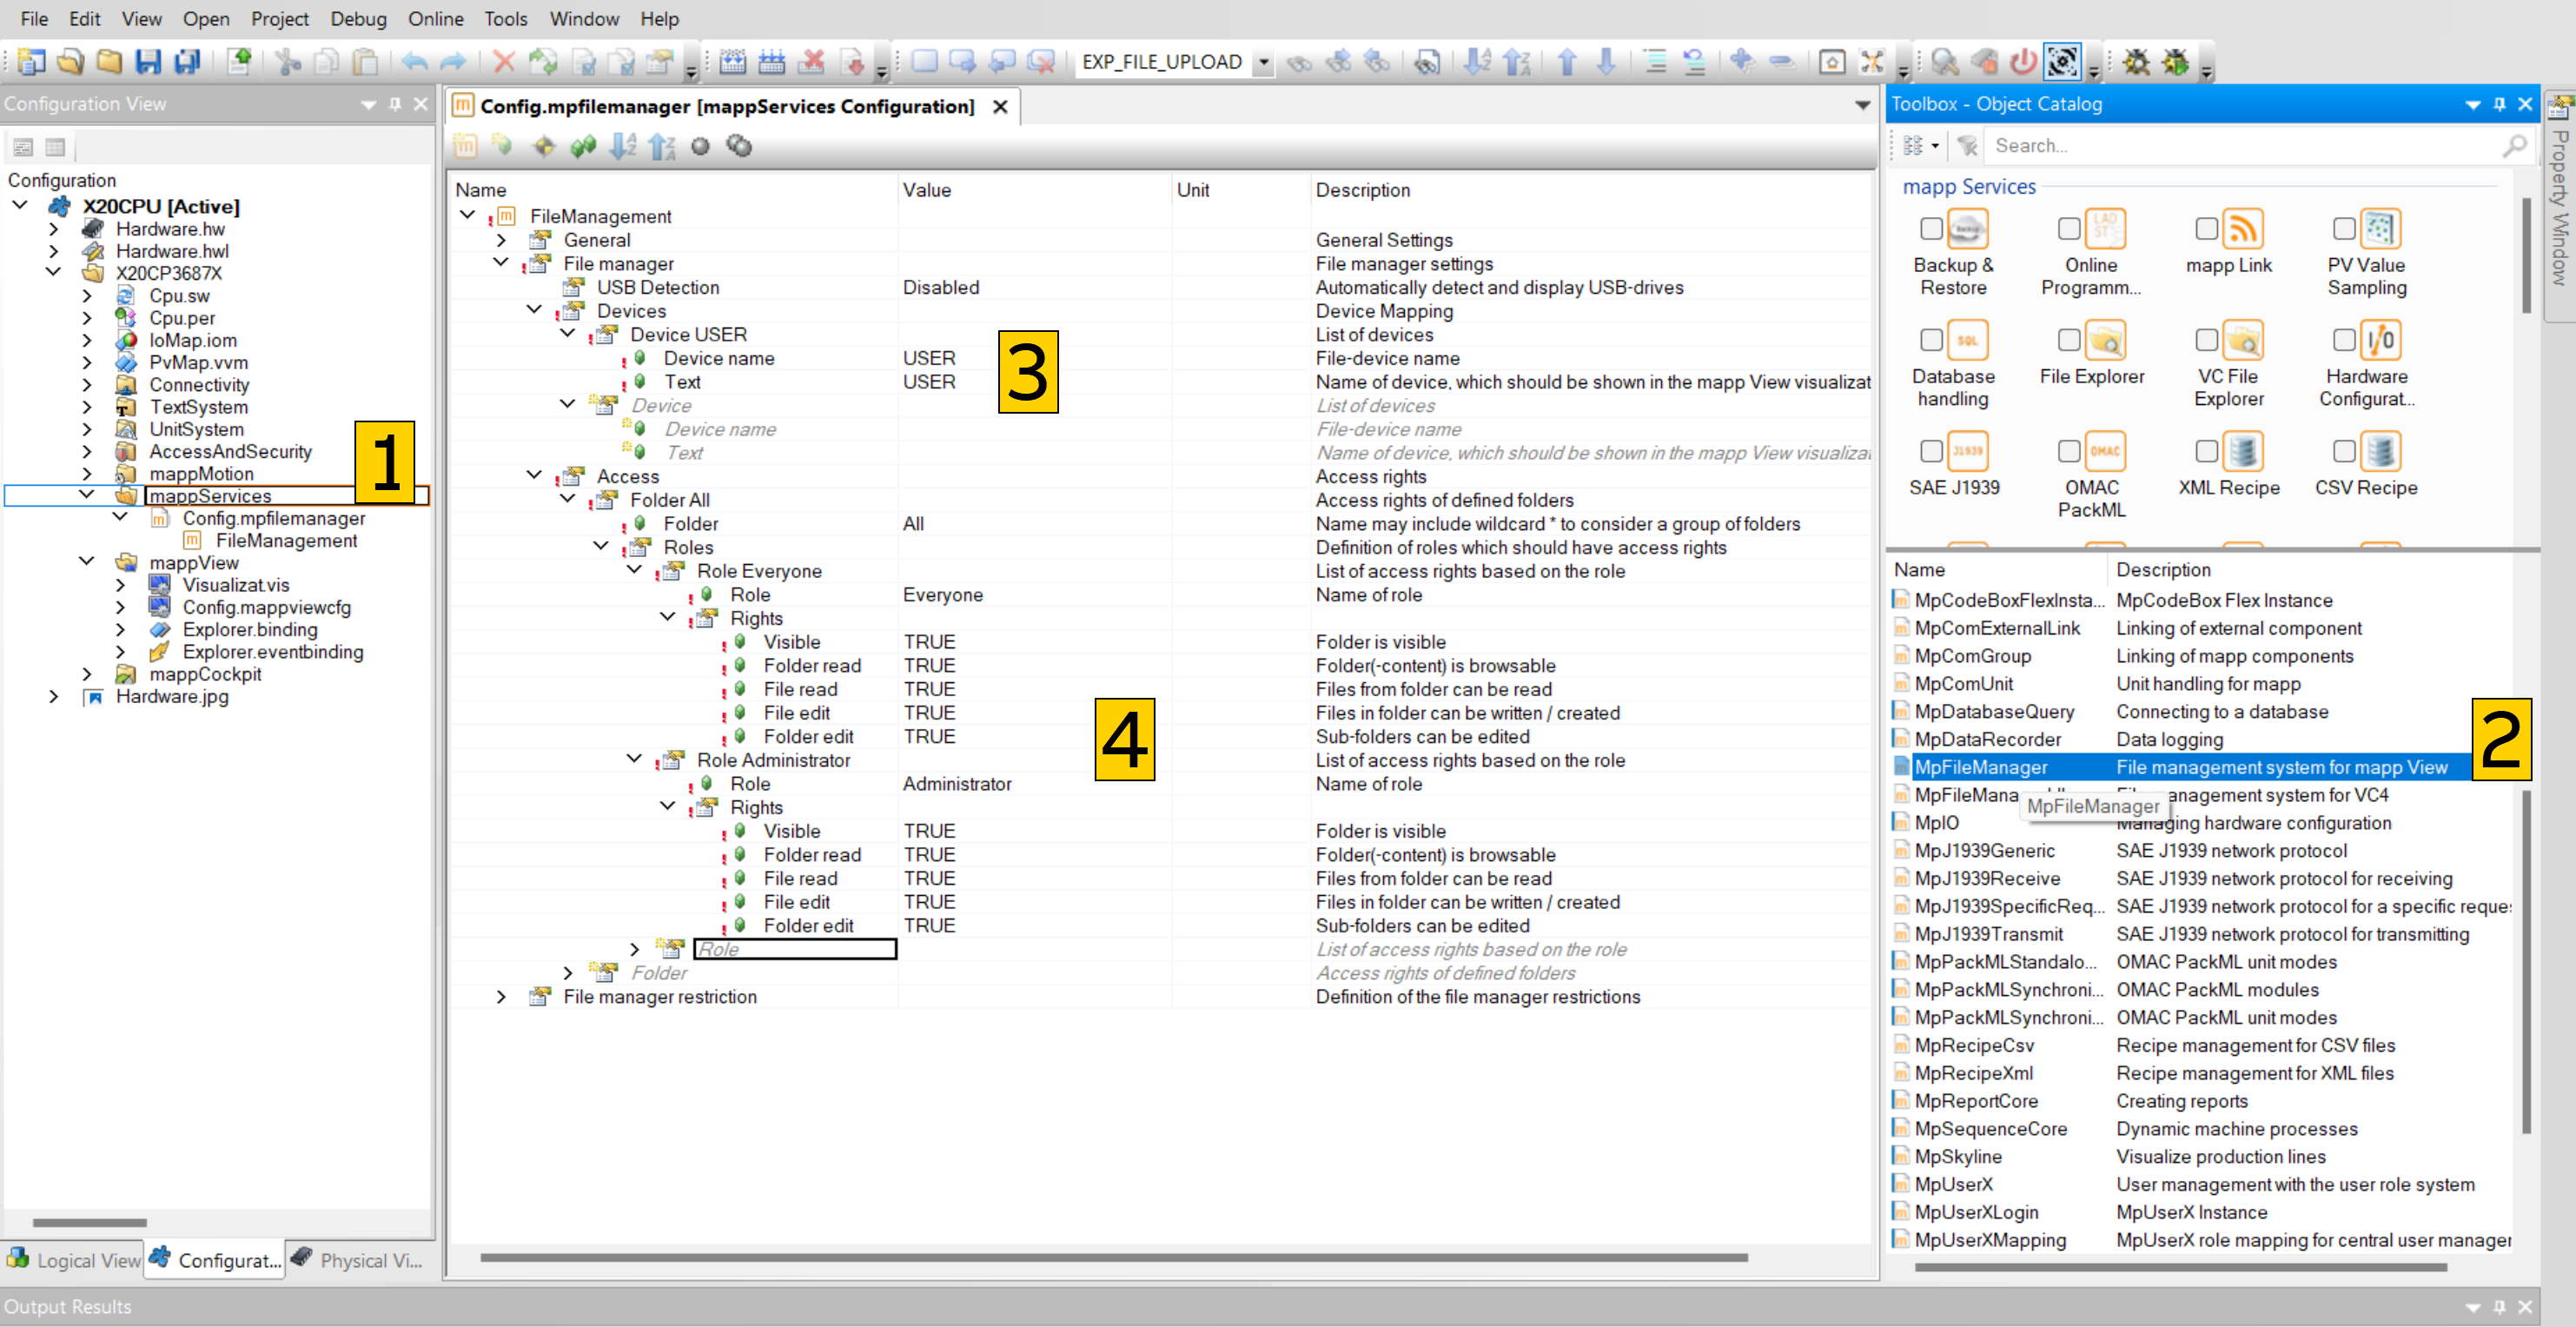
- In the existing project open the Configuration View, click on the
mappServices - Add a new mappService of type
MpFileManager - Enter the device name from the previous step
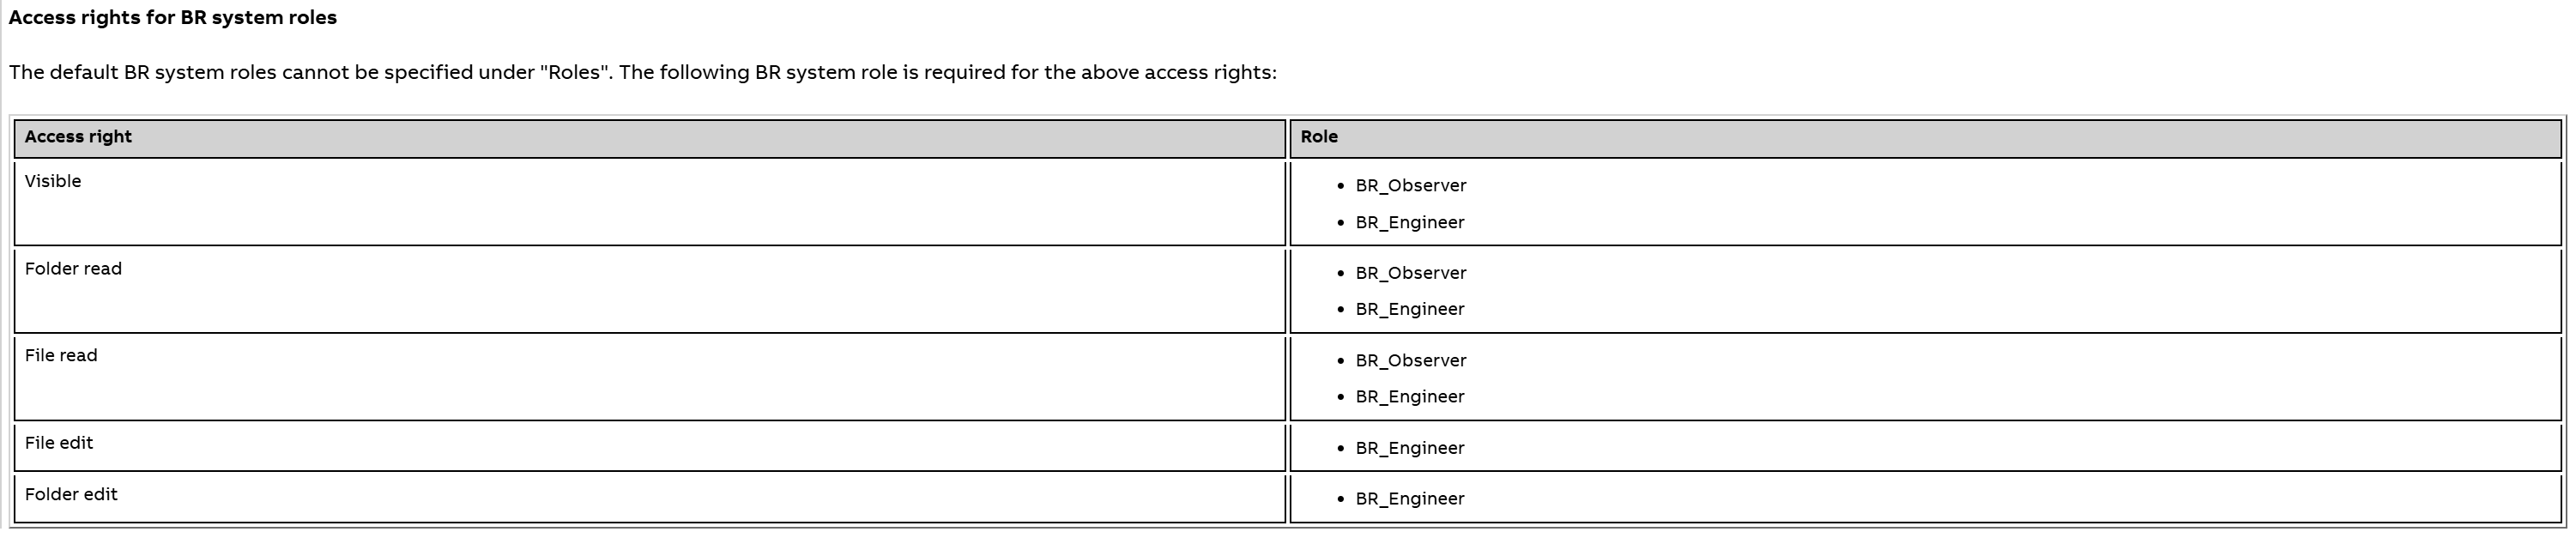
- Add user roles and permissions as needed
Pay attention to the "well known roles" as described in the Automation Help.